Getting Started: Essential Tips for Women New to Mountain Biking
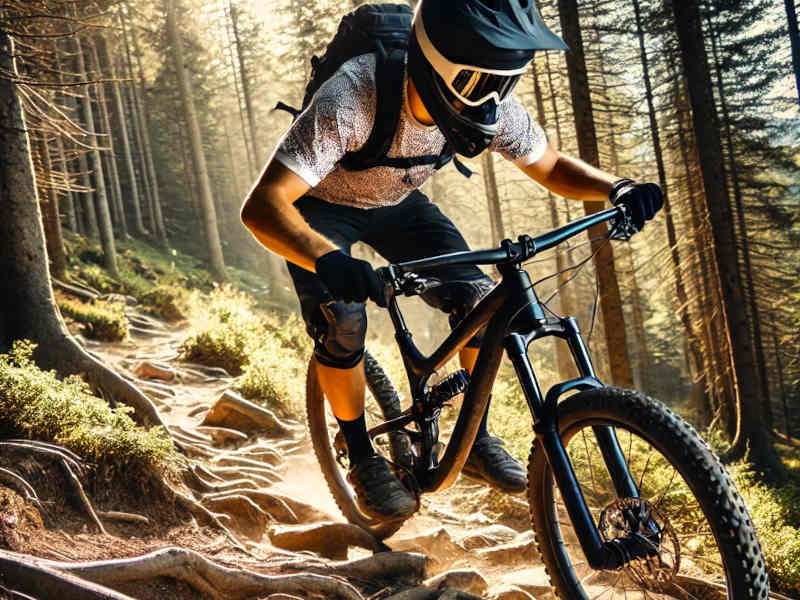
Mountain biking is an exhilarating way to explore the outdoors, build strength, and have a blast on two wheels. If you’re a woman new to the sport, there are a few things to keep in mind to ensure a safe, enjoyable, and confidence-boosting experience.
Bike Setup Tips
Find the Perfect Seat Height
Getting your seat height right can make or break your ride comfort and efficiency. Here’s how to do it:
- Sit on your bike with one pedal in the lowest position (6 o’clock).
- Place your heel on that pedal. Your leg should be straight but not overextended.
- When you switch to riding with the ball of your foot on the pedal, your knee will have a slight bend, which is ideal.
Adjust the seat height using the seat post clamp or a quick-release lever, depending on your bike.
Check Your Tire Pressure
Tire pressure is crucial for grip and control. For most mountain bikes, aim for 20-35 psi. Heavier riders or rocky trails might need higher pressure, while lighter riders or soft trails can go lower. Experiment to find what feels right.
Handlebar Height
Women may benefit from slightly higher handlebars to compensate for a shorter torso-to-leg ratio, which can help you maintain a more comfortable and stable riding position.
Saddle Position
Adjusting the saddle tilt or sliding it forward can help align your hips properly for climbing and descending.
Be Prepared
Safety Gear: Stay Protected
Always wear a helmet. A well-fitting helmet is your first line of defense against injuries. Add gloves for grip and protection, padded shorts for comfort, and knee and elbow pads for extra safety, especially on technical trails.
Bring the Right Tools
Mountain biking often means being far from help, so pack these essentials:
- A tire pump.
- A patch kit and/or extra tubes.
- Tire lever for removing a tire if the tube needs replacing.
- A multi-tool with Allen wrenches.
- A chain tool and quick links.
Know Trail Etiquette
Being courteous keeps everyone safe and happy. Follow these basic trail rules:
- Yield to uphill riders—they’re working harder!
- Announce yourself when passing by saying, “On your left” or ring a bell.
- Stick to designated trails to preserve the environment.
- If you come across hikers or horse riders, give them the right of way.
Choose Trails for Your Skill Level
Starting on beginner-friendly trails builds your skills and confidence. Look for trails labeled “green” on trail maps. Gradually work up to more technical terrain as you gain experience.
Essential Skills for Women Riders
Braking
The Role of Each Brake and Why It’s Especially Important in Mountain Biking
Your bike has two brakes:
- The front brake provides the majority of your stopping power (up to 70%).
- The rear brake helps with control, especially on loose or slippery surfaces.
Understanding how and when to use each brake is essential.
Avoiding the Over-the-Bars Wipeout
Using only the front brake—especially in an emergency stop or down a steep slope—can shift too much weight forward, making it easy to go over the handlebars. Here’s why:
- When you brake hard with the front brake, the bike’s momentum causes your weight to shift forward.
- This forward shift reduces the weight on the rear wheel, making it more likely to lift off the ground.
- Without enough rear wheel contact, the bike can “endo” (flip forward), sending you flying.
To avoid this, always use both brakes together.
Interesting Tidbit: The front brake is usually controlled by the left hand brake lever. This is for a reason. Most people are right-handed and have less strength in their left hand. Using the left brake lever for the front brake means you’ll naturally use less power in it when braking, helping to avoid an endo. But you still need to be aware and consciously avoid using only your left brake to stop.
Body Position
Women often have a lower center of gravity. Use this to your advantage:
- Stay centered over the bike with a slight bend in your elbows and knees.
- On descents, shift your weight back slightly for stability.
- For climbs, scoot forward to keep the front wheel down.
Lifting the Front Wheel
Practice wheel lifts for hopping over obstacles:
- Compress your body downward.
- Pull up with your arms while shifting your weight back.
- Use a quick “pop” motion to lift the wheel.
Gearing
- Uphill: Use lower gears to spin easily without exhausting yourself.
- Downhill: Shift to higher gears for better control and stability.
- Always shift gears before hitting steep gradients to avoid losing momentum.
Look Ahead
Keep your eyes focused a few feet ahead to pick your line and spot obstacles early. This helps you plan your moves and stay in control.
Higher Cadence
Maintaining a higher cadence (spinning the pedals faster, typically 80–100 revolutions per minute) is generally advantageous when mountain biking. A higher cadence has several benefits, but there are exceptions when a slower cadence might be better.
Why a Higher Cadence is Advantageous
- Efficiency and Endurance
- Spinning at a higher cadence reduces strain on your muscles, especially your quads, by distributing the workload more evenly across your leg muscles and cardiovascular system.
- This helps conserve muscle energy, allowing you to ride longer and recover faster after climbs or technical sections.
- Better Traction on Loose Surfaces
- On gravel, sand, or mud, a higher cadence in a lower gear provides smoother power delivery to the rear wheel, reducing the chance of losing traction or spinning out.
- Improved Control on Technical Terrain
- Higher cadence allows quicker adjustments to pedal strokes, helping you make it over rocks, roots, and other obstacles with greater precision.
- Less Fatigue on Climbs
- When climbing steep terrain, spinning in a lower gear with a higher cadence helps prevent burnout. Your muscles won’t be forced to push against heavy resistance, making the climb feel more manageable.
Exceptions: When Lower Cadence on a Higher Gear is Better
- Short, Steep Climbs
- In situations requiring a sudden burst of power, a lower cadence (50–70 rpm) in a higher gear can generate the force needed to muscle through short, steep sections.
- Technical Downhills
- On steep descents or technical downhill sections, pedaling isn’t always necessary, and a lower cadence—or coasting—is better to focus on bike control and balance.
- Flat Out Sprints
- For maximum power output over short distances, like sprinting to the finish line, a lower cadence paired with a heavier gear can help you generate more force.
- Fatigue or Recovery Periods
- If your heart rate is too high, slowing your cadence and pedaling in a slightly higher gear can help lower it while keeping you moving.
In most mountain biking scenarios, a higher cadence is advantageous for efficiency, traction, and control. However, lower cadence has its place in power-intensive or technical moments. The key is to learn when to adjust based on the terrain and your energy levels. The more you practice, the more you’ll get the hang of it – which is a good thing because practicing mountain biking is fun!
Tackle Turns Like a Pro
Five Tips for Tackling Turns in Mountain Biking
- Look Where You Want to Go
- Keep your eyes focused on the exit of the turn, not the obstacle in your way. Your bike follows your gaze, so looking ahead helps you choose the best line and avoid unwanted surprises.
- Position Your Body Correctly
- Lean your bike into the turn while keeping your body more upright. This helps maintain traction on the tires.
- Drop your outside pedal to the 6 o’clock position and push your weight through it for better stability and grip. This also prevents the inside pedal from hitting the ground during the turn.
- Brake Before the Turn
- Slow down before entering the turn, not during. Braking mid-turn can cause your tires to lose grip, leading to skids or crashes. Once in the turn, focus on maintaining a steady speed and flow.
- Stay Low and Loose
- Bend your knees and elbows slightly to lower your center of gravity. Stay relaxed so you can react to changes in the trail and absorb bumps more easily. A stiff body reduces control.
- Use the Whole Trail
- Start wide, cut to the inside apex of the turn, and exit wide. This “outside-inside-outside” line gives you the smoothest path through the turn and helps you maintain speed.
Practice these tips regularly on varying trail conditions, and you’ll feel more confident carving through corners like a pro!
Stay Loose
Staying loose while mountain biking allows your bike to move freely beneath you, helping you maintain balance, traction, and control over uneven terrain. Keeping your body relaxed and your arms and knees flexible absorbs shocks and adjusts quickly to trail changes. A stiff, rigid posture reduces your ability to react and can make the ride rougher and less enjoyable. I speak from experience – when beginning, my steep descents on bumpy trails were jarring and painful and I felt out of control. After more practice, these descents are now fun and the highlight of my ride!
Keep Your Core Engaged, but Your Limbs Relaxed
- Think of your core as the stable foundation while your arms and knees remain relaxed and flexible. This balance allows you to maintain control without becoming overly stiff.
Bend Your Elbows and Knees
- Keep a slight bend in your elbows and knees at all times. This creates “suspension” that absorbs shocks and lets you adjust to sudden bumps or dips in the trail.
Let the Bike Move Beneath You
- Allow your bike to tilt, bounce, or shift under your body as needed. Avoid gripping the handlebars too tightly; a relaxed grip improves steering precision.
Keep a firm stance on your pedals
- By pushing down on your pedals and keeping your core engaged (as described above) you maintain better control.
Embrace Challenges
It’s normal to feel intimidated by technical sections or steep descents at first. Break down challenges into smaller goals.
Celebrate small victories, like clearing a tricky root section or completing your first climb without stopping.
Take Care of Yourself Post-Ride
Recovery is just as important as the ride itself:
- Fuel up: Eat a protein-rich snack to help your muscles recover.
- Stretch: Focus on your legs, back, and shoulders to avoid soreness.
Other Tips for Success
- Practice often, but start slow to avoid burnout or injuries.
- Join a women’s mountain biking group or ride with friends for camaraderie and support.
- Watch videos on the fundamentals and how to improve your skills, like this one from Roxy.
- Take skills training classes.
Mountain biking is a rewarding adventure that’s accessible to everyone, especially with the right preparation. Start by setting up your bike for comfort and safety, wearing protective gear, and packing essential tools. Learn basic trail etiquette and choose trails that match your skill level. Build foundational skills like proper braking, body positioning, and gearing. With practice, you’ll become more confident and ready to tackle new challenges.
Remember, mountain biking is about fun, freedom, and progress. Take it one ride at a time and enjoy the journey!

by: Cory Willins
Cory is a dynamic and passionate content writer, specializing in sports-related topics. With over a decade of experience in the field, Cory has established… read more

